Bruce's Tips for the Flyin' King
Use the flaps like the full-scale guys. Always slow
down before deployment. Add half flaps on downwind, then full flaps
on base or final. Remember, the first half of deployment gives you
lots of extra lift; the last half gives you lots of extra drag. If
you're doing a touch-and-go, raise the flaps before takeoff.
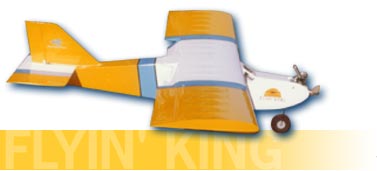
The wing was designed with just enough span to make it
legal for IMAA fly-ins. Most builders can transport an 80" wing with
no problem. Still, some modelers ask about splitting the wing into
two or three panels. I think a lighter and simpler solution would be
to clip one rib bay from each outer panel, bringing the wingspan down
to a more manageable 72".
Trike gear works great, particularly on paved runways.
One common mistake with any trike gear setup is too much nose wheel
movement which can cause snaking on the takeoff roll and tipovers.
Use 10-15 degrees of movement each way. If it looks like not enough,
it's probably just right.
You can build the Flyin' King with or without flaps. The flaps add
only slightly to the overall
time to build. I really recommend building it with flaps, even if you
don't expect to use them much. It might surprise you how effective
and fun they are to play with. Consider it valuable practice for that
beautiful scale model you're going to build someday.
For the most professional-looking window treatment, try the
Fourmost window flange material. You'll need three packages of the
medium size (FOR 133, $3.95/pkg.). It takes some patience and careful razor blade work to
make the corners fit neatly, but it's well worth it. The final result
is fantastic! Fourmost products are available from BTE.
An alternate way to finish the windows is to inlay them into grooves
around the window openings. Now, I'm good with an X-Acto, but not
that good! The grooves can be cut using a Rout-A-Bit (available from
BTE); a handy, high-quality, miniature router bit that attaches to any
Dremel tool. Once the windows are glued into place, the edges can be
covered up with striping tape.
Monokote can be "pre-assembled" on glass before
attaching it to the structure. To duplicate the stabilizer stripes on the
BTE prototype, cut the three colors accurately, overlap the edges about
3/16", then carefully iron the overlaps with a trim iron. It won't
stick to the glass, so you can lift the whole shebang and iron it in
place on the model. CAUTION: Be careful to keep your iron away from
the overlaps - the heat may soften the bond and allow the seam to
split apart. Messy!
Install your radio toward the rear of the cabin, leaving
the forward portion, directly under the CG, available for "cargo" such
as a camera, candy, parachutists, toilet paper rolls, propaganda
leaflets, flour bombs, whatever... The Flyin' King should have no
trouble lifting up to an extra five pounds or so.
Standard servos (45-50 oz.-in. of torque) are okay for the Flyin' King, but if you
do have a stronger servo (60-80 oz.-in.), I'd recommend using it for the flaps. They
are big and deflect a long way, resulting in high air loads.
Jazz up your model with polished gear! Start with a
file to round off the edges, followed with some 150-grit sandpaper,
wet or dry. Remove scratches with 320, finish sand with 400, then
apply metal polish and elbow grease. This is grimey work - wear old
clothes or coveralls. It's worth the effort!
<Back
To Flyin' King Page